A Spring Wreath Tutorial
Hi there, Friends! I hope you’ve had a good week so far. Yay, it’s almost Friday!
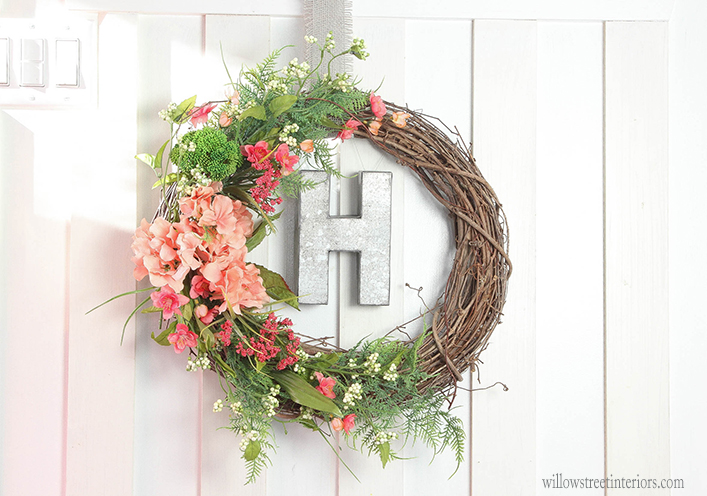
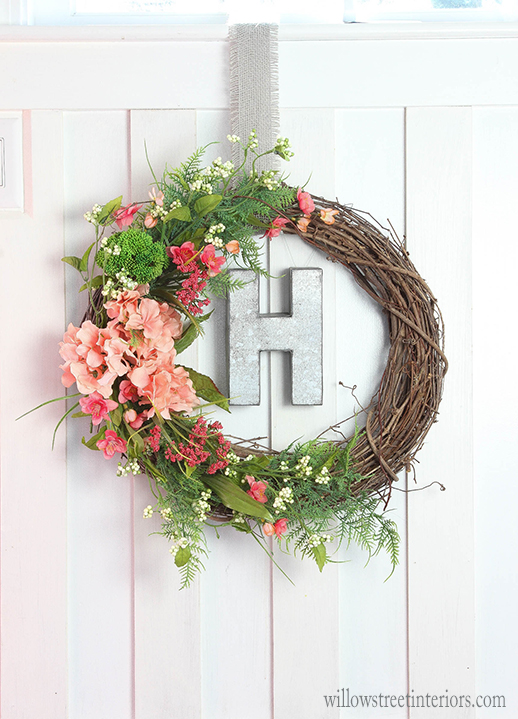
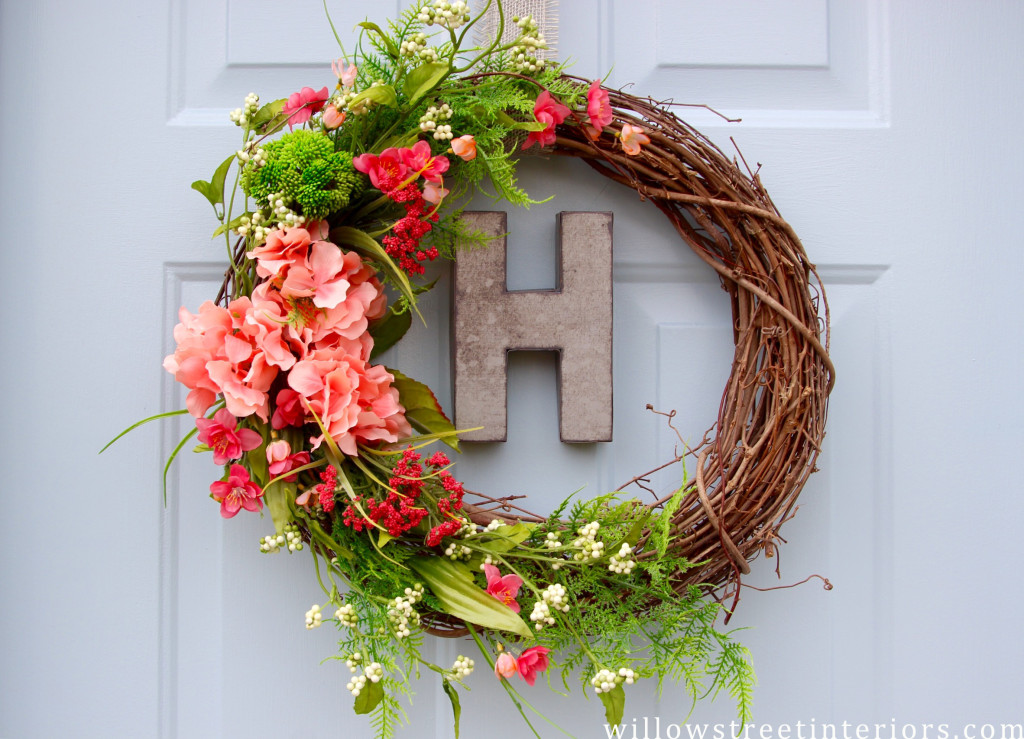
I thought I’d pop in and show you all how I made this pretty spring wreath today. It was incredibly quick to put together, and so simple to make.
There’s a fun tag going on on Instagram called #Create4Spring, and this week is all about garlands, buntings, and wreaths. I really hadn’t ever made a wreath before {aside from adding a little extra faux forsythia branches to a predecorated wreath that I bought years ago, if that counts}.
I’ve been wanting to get a new wreath for my front door for years, but wasn’t ever able to find one that I was really in love with. And wreaths can be expensive, so I didn’t want to spend money on one that I didn’t really love.
But anyway, when I saw one of my IG friends, who’s also a host of the tag, (check out @tonalitydesigns, she’s so talented!) announce the tag, I knew I had to try my hand at wreath making.
This wreath looks complicated, but I’m telling you, it took me 20 minutes to put together, plus the clean up time.
I basically went into Michael’s and looked for flowers that would make a beautiful bouquet, and then added in some fun, fern-like greenery because I knew I didn’t want the wreath to be over the top feminine. When you’re working with flowers, it’s nice to toss in one or two unexpected elements to the arrangement. For my wreath, that’s where the monogrammed letter and bright green succulent came in. I love how the galvanized letter lends a down to earth and farmhousy feel, without being kitchy.
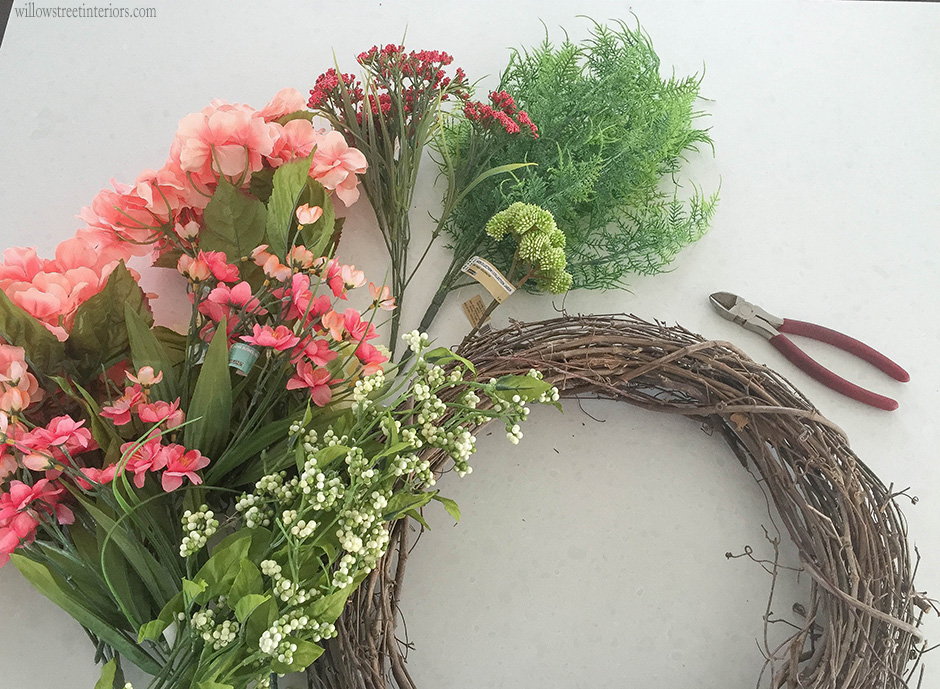
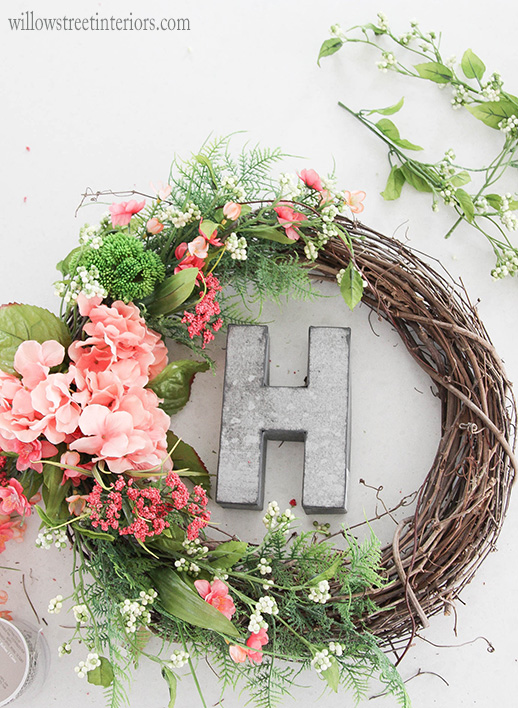
So here’s what I came home with, minus the actual wreath. I just pulled all of the forsythia branches out of my old wreath, and this ↑ is what I was left with.
To make this wreath, the key is choosing:
• 2 or 3 different sized flowers (similar in color, but varying shades)
• some wispy greenery,
• one or two unexpected elements (in this case, a bright green succulent and galvanized letter),
• and one or two types of berries.
If you look closely at the above photo, you can see that these are the elements that I used, and it makes for a beautifully textural and interesting composition, doesn’t it?
Ok, next up, start cutting all of your branches apart, so you have more flexibility with how you can arrange them.
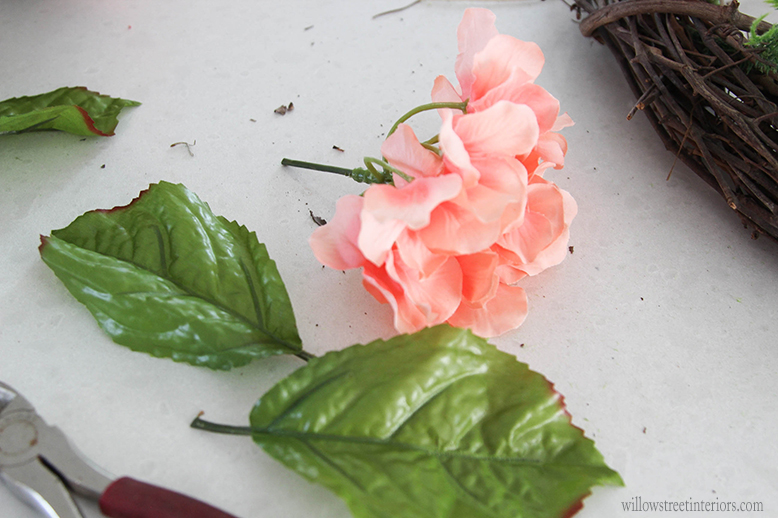
I thought I had more photos of the clippings, but I can’t find them. It’s been one of those weeks, Guys. But I hope you can still get the idea. I just cut apart each bundle of flowers, and left the stems long enough to firmly stick into the wreath. I even cut the leaves from the hydrangea, so I could really stick them exactly where I wanted them.
I used my husband’s wire cutter to cut the branches, and you’re going to want to use one too. Scissors just aren’t going to cut it.
Get it? 😉
I know, I’m a super dork sometimes.
Anyway, if you don’t have a wire cutter, you don’t even have to go to the hardware store for one. They sell those at Michael’s too!
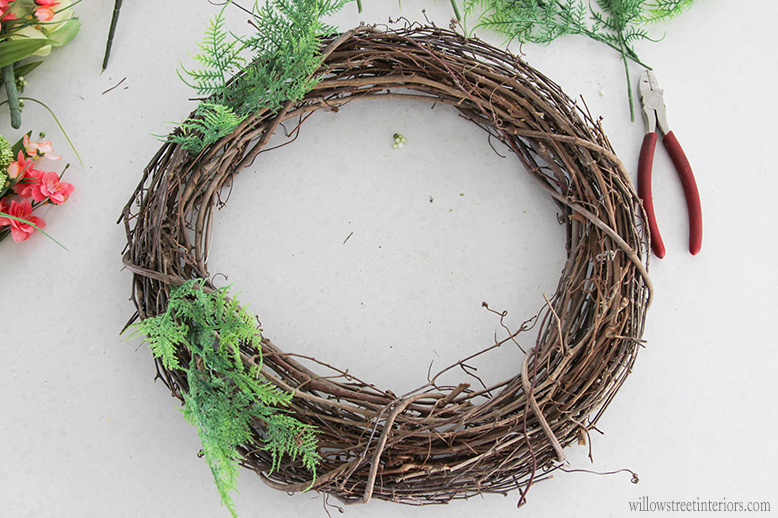
Start arranging your greenery. Begin inserting your greenery stems around 8 o’clock, and feather them down to roughly 6 o’clock. Then do the same thing with a bit more greenery, except this time, begin by inserting the stems around 10 o’clock and feather them up to roughly 12 o’clock {see above photo}.
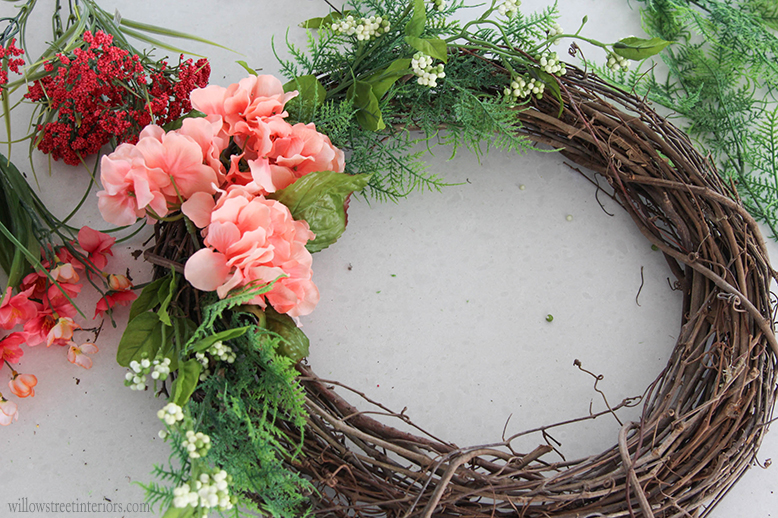
Next, add a grouping of the largest flowers that you chose at roughly 9 o’clock. In this case, I added 3 hydrangea heads. I also added a couple of the leaves that I’d separated from the stem back in.
Once you’ve done that, take a couple sprigs of the berry branches that you picked up, and nestle them behind the larger flowers. One should extend about 5 inches up the wreath, with the other branch extending 5 inches down the wreath. {see white berries above}.
It’s starting to take shape, but it’s not finished!
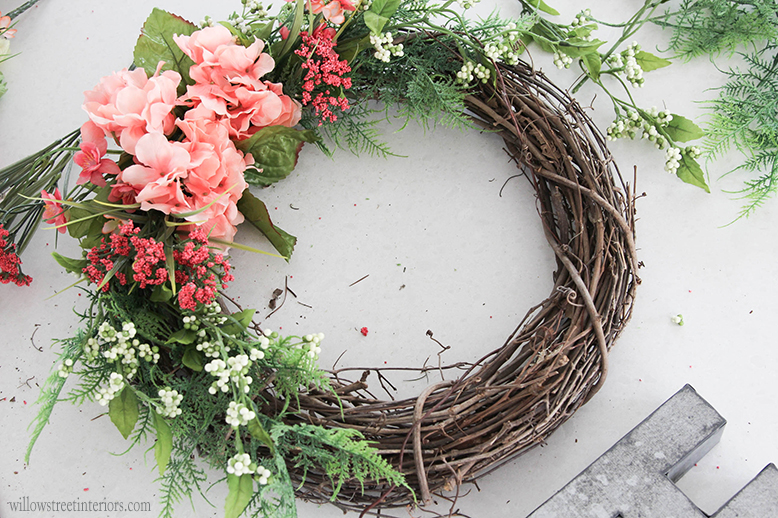
Continue adding berries. I actually decided to get two different colors, one white and one coral. I kept the coral berries closer to the hydrangeas for more impact. See?
Remember how I mentioned getting two or three different size flowers in varying shades of the same hue? Well, here’s where that comes into play. I tucked in a few of the smaller flower branches around the 9 o’clock part of the arrangement. See those pretty, corall-y/peach cherry blossoms nestled around the hydrangeas up there?
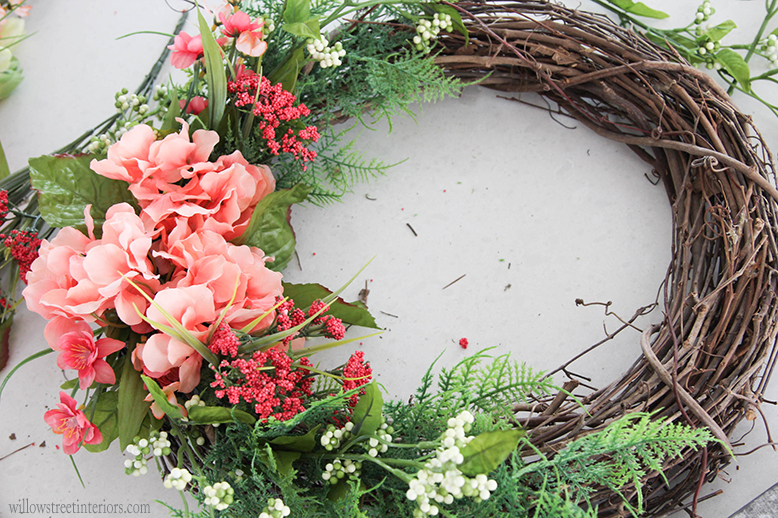
Then, add a few leaves, and a few more sprigs of your greenery, until your wreath looks fabulous!
You want to have your wreath filled from 6 o’clock to 12 o’clock, with the adjacent side bare.
Next up, add your galvanized letter! You’re almost done!
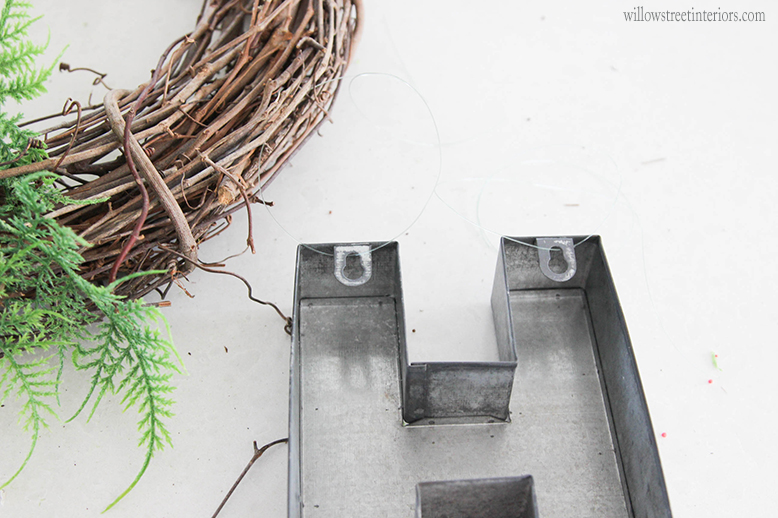
I used my husband’s fishing line for this, which I thought was a great idea because it’s pretty much invisible. In retrospect, I think some simple sewing thread would have been better. The fishing line is very smooth, and my knots kept slipping out! Thread would have been just as subtle and easier to work with.
Once your letter is threaded, just tie it on to the wreath. And you’re done!
I’d love to hear how your wreath making goes, if you make one! Have a great rest of the week, Folks!
Laura ♥

I need to try making this! I love the bright colors and that blue door looks amazing with the wreath. Thank you for sharing how to make one!!!
You’re welcome, Liz! Have fun making yours! I’d love to hear how it goes 🙂
Laura, you are such a talented, designer, decorator, and magician!! This is absolutely beautiful!! I wish I lived closer to you! Thanks for the inspiration!!
Patty
Thank you so much, Patty! It’s so nice to hear from you. I have to say, I went back and reread my post for mistakes when I realized you read it! 🙂 I never would have thought that I’d be putting my writing skills to use by blogging about interior design when I was in high school, that’s for sure! I hope you’re well. Your classes were honestly always my favorites! <3
I absolutely LOVE this! I need to go to Michael’s first thing tomorrow so I can make one!
Oh, yay! It’s so simple, I think you’ll love making it, Erin 🙂
My daughter and I are going to try to make these whult she and my grandkids are here on spring break. Thinking instead of the letter to put a cross in the middle for Easter then after Easter put the letter in it. Love all your diy projects. You are such a talent!!
Thanks so much for your sweet words, Pam! I LOVE the idea of putting the cross in the center for Easter. What a great idea! I’d love to hear how it goes, or you can tag it #DIYwithWSI on instagram so I can see it! 🙂 Have a lovely night. XO
A year later, but I did it! I thought I was making it totally different and turns out it looks almost exactly like yours! Haha!! Thanks so much for the tutorial! I would leave a picture but I can’t figure out how… 🙂
Yay, Hillary! Oh my gosh, I’d love to see it! Are you on Instagram? You could post and tag me @laura_willowstreetinteriors or email it to me laura@willowstreetinteriors.com. I’m so happy to hear another success story! Thanks for letting me know!!